■
System admins can sync and provision users from a source account with Simpplr.
What is user syncing?
User syncing is a feature in Simpplr automatically pulls data from an external source so that employee profile information is up to date. To keep your users' data up-to-date, you can synchronize profile data from your source account, like Google, with Simpplr. Data from your selected source will be synchronized with Simpplr's People directory on a nightly basis.
System admins can sync and provision users using with the following source accounts:
- Simpplr User Services (via CSV connector)
- Salesforce
If you use a different source account, you can set up provisioning from your SSO using the pre-built integration with Salesforce. Azure and OneLogin offer pre-built integrations.
What is user provisioning?
User provisioning synchronizes the creation and deactivation of users between Simpplr and a chosen source, like Google. If Google is selected as the source account, when a user is created in Google, then a user is also created in Simpplr. Conversely, deleting users in Google will automatically deactivate them in Simpplr.
You can either provision users automatically or manually in Simpplr. Most SSO applications support automated provisioning and deprovisioning. We do support Just-In-Time (JIT) provisioning, however, there are implications to using JIT provisioning, such as inaccurate data in the Simpplr people directory.
The following source accounts for syncing people data with Simpplr are:
- Azure Active Directory
- Okta
- UKG Pro
- Workday (via JSON converter)
- Simpplr User Services (via CSV connector)
- Salesforce
Note
User provisioning through Simpplr can only be done with Google or CSV file. User provisioning with Active Directory and other platforms must be done through Salesforce.
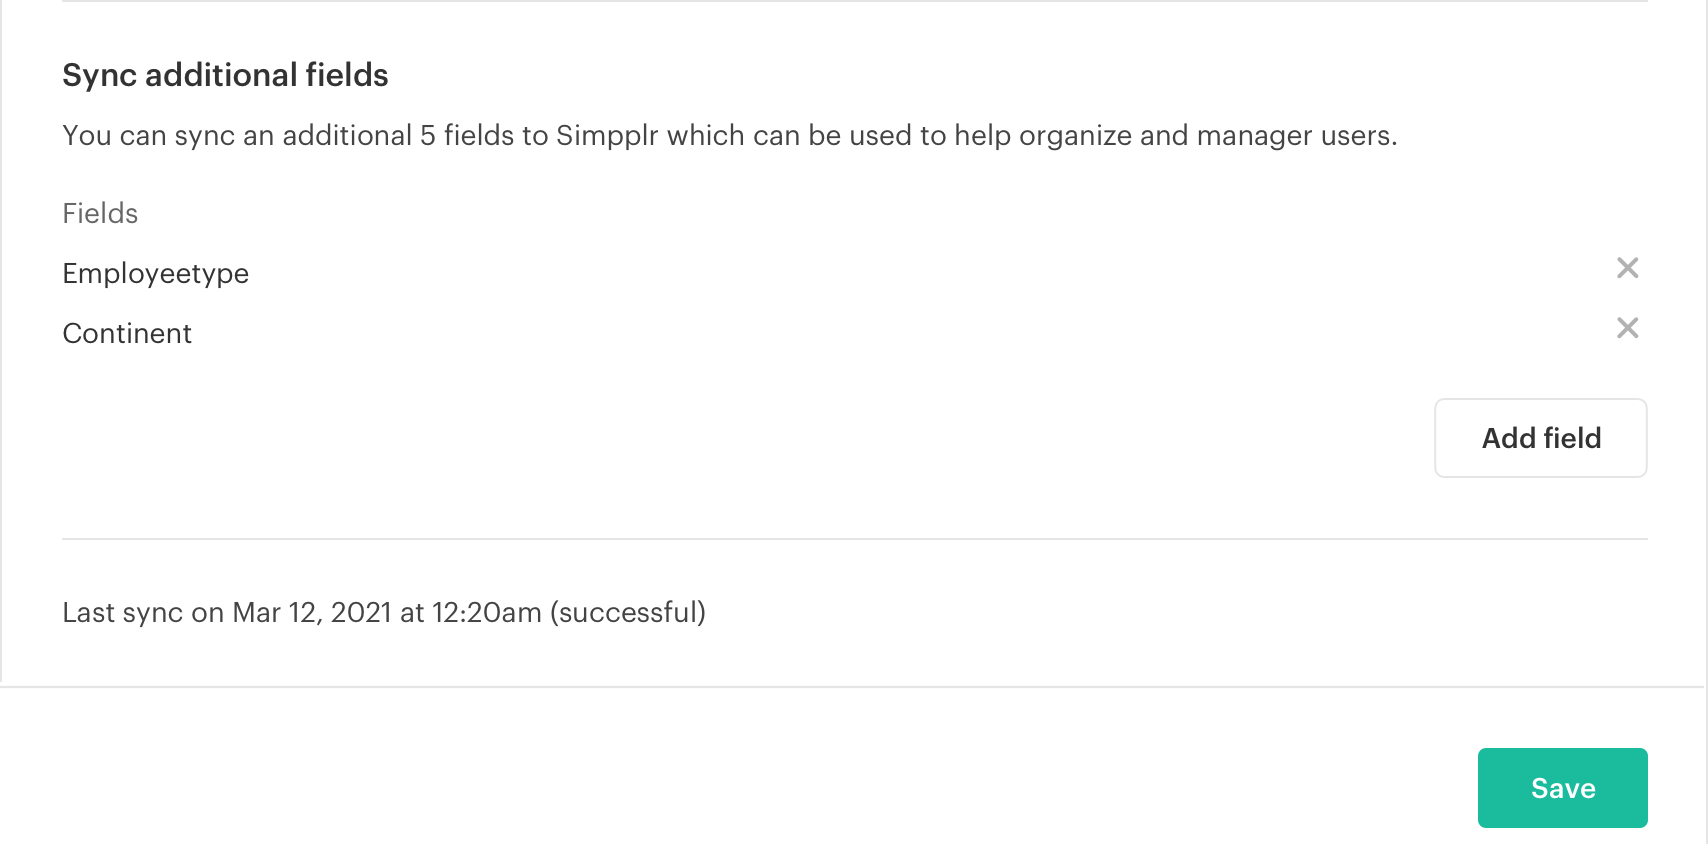
Additional syncing fields from your source account
Up to 25 (Note, prior to the Jackson release, the maximum number is 5) additional fields can be synced from your syncing source into Simpplr. These fields can be mapped to a custom label in Simpplr, which allows the data to be used for segments, audiences, and/or optionally displayed on users' profiles.
When adding additional fields, a modal will open. Select the following:
-
The field to sync from. Add the Azure Active Directory attribute name.
-
Singular label for the field (for example, "Color")
-
Plural label for the field (for example, "Colors")
-
Whether or not the filter should be displayed on the People listing (true/false)
If the field names between Simpplr and Azure Active Directory aren't in sync, a text box will open for you to enter the field name in Simpplr as it appears in Azure Active Directory.
option to Add field
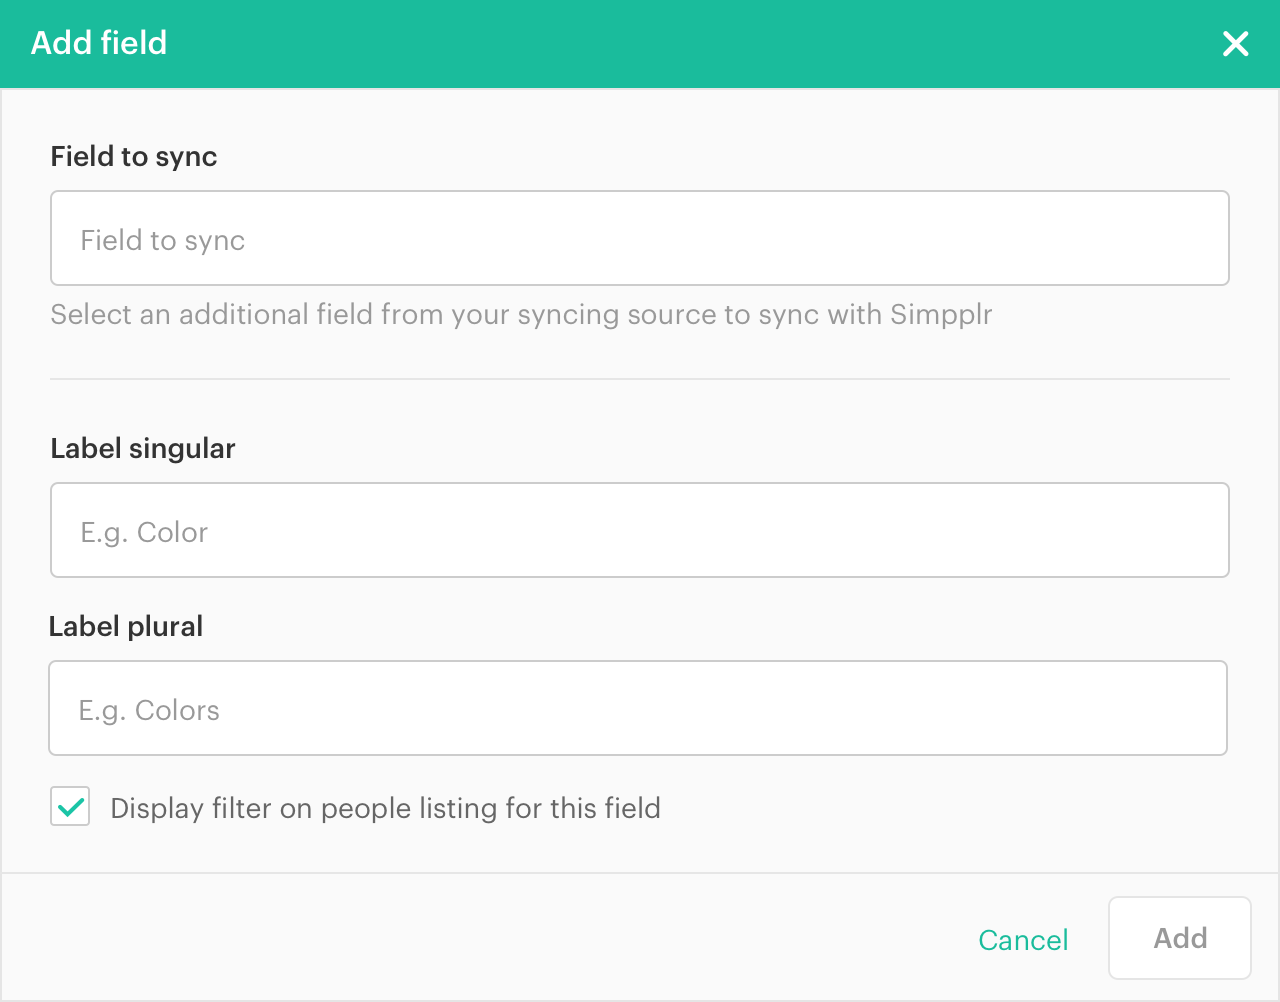
Add field modal
Comments
Please sign in to leave a comment.